 Have you seen all the creative things people are doing with vintage suitcases? I am in love! I don’t know if it’s because I love anything vintage, or because of all the times I’ve moved in my life (let’s just say that currently, the record in one house is 4 years), or because of all the pins on Pinterest. There are so many possibilities! Besides the more common ‘stack of suitcases’, you can make a pet bed, a chair, or a table. You can even make shelves and drawers or medicine cabinets out of them. Look here for a bit of inspiration.
Needless to say, I have a small collection of vintage suitcases and trunks and this weekend, I finally got around to doing something with one of them.
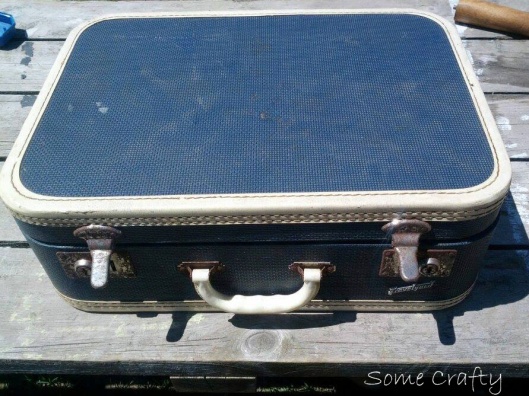
The suitcase…
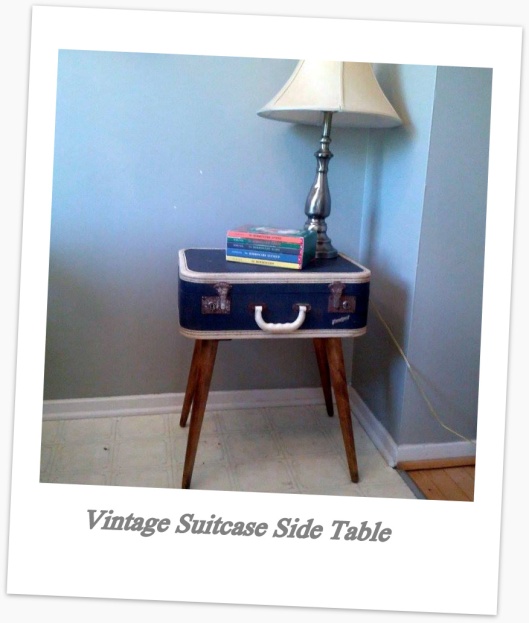
I decided to make an end table out of one of mine. You could try the hardware store for legs, but I like to see what I can reuse from something else. So, I hit up some thrift stores to see what I could find. Enter a cute little circle side table that had just the legs I was looking for! And for a whopping $5! Unfortunately, I forgot to take a before pic of the table, but I have a few ideas for repurposing the top.
I removed the legs from the table and set them aside while I gave the suitcase a little tlc.
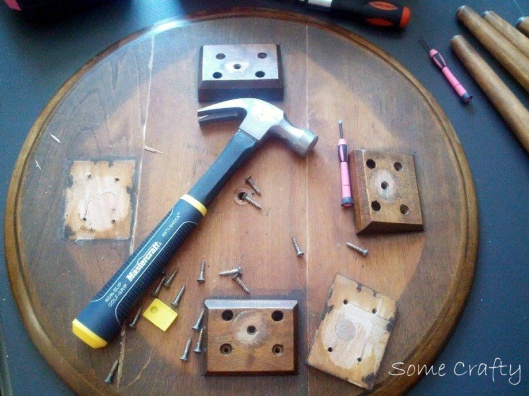
Removing the legs
Next up was to position where I wanted the legs to be and drill pilot holes.
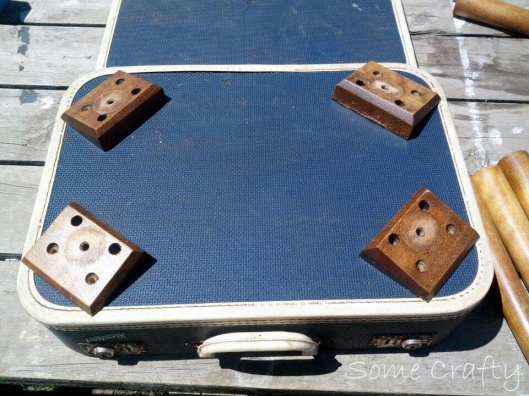
Positioning the legs
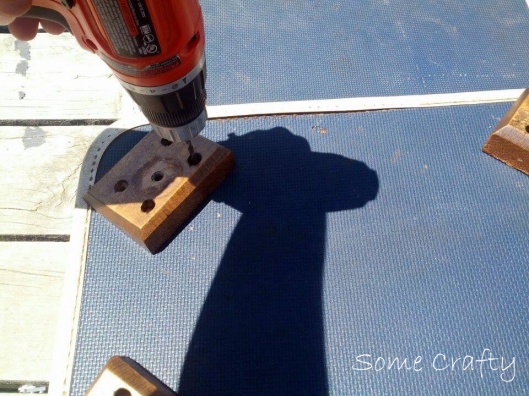
Drilling the pilot holes
Attach the legs, turn it over, and voila!! Perfect! You can even use the inside of the suitcase to store your journal, or some books, or whatever else you can think of.
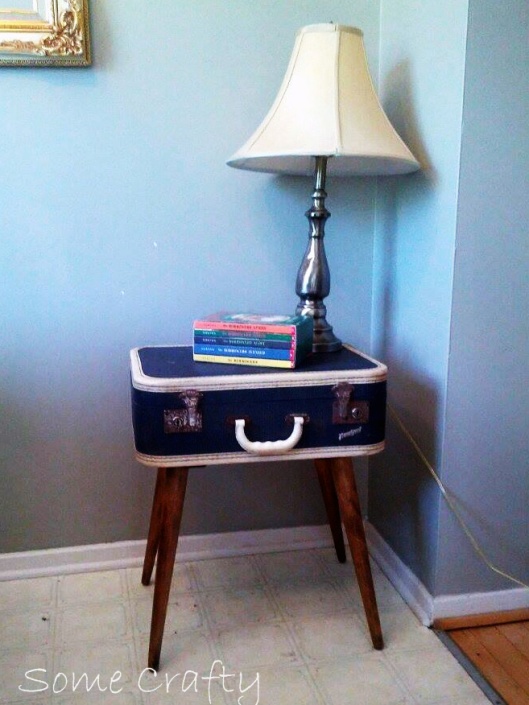
Voila! A unique side table!
Depending on the suitcase, you may want to add a bit of plywood to the inside to make it sturdier. Just cover the plywood with a bit of pretty fabric. And if you’re worried about attaching the legs securely and esthetically, you could use Chicago screws, which will ensure a secure fit without any protruding screw ends.
I have plans for this table in our guest room. Can’t wait to be able to work on it.
What would you make out of a vintage suitcase?
~Angie
Linking up with:
http://www.artsychicksrule.com/2013/05/project-inspired-linky-party-15.html

http://www.redouxinteriors.com/2013/05/link-party-105-and-les-features-plus-i-am-hitting-the-road/
http://www.commonground-do.com/
http://www.lifewelive4.com/2013/05/linkyparty13.html

http://www.artsyfartsymama.com/2013/05/artsy-corner-link-party-3.html

http://www.housewifeeclectic.com/2013/05/creative-showcase-creative-link-up-with.html